Search Results:
Why do sensors expire?
Sensors contain chemicals and components that naturally expire over time. To ensure accuracy and reproducibility, each sensor has a limited lifespan. NIOX® sensors expire after the maximum number of measurements has been reached or after one year of use, whichever comes first.
Your device will notify you when the sensor needs replacing, through the information tile located on the home screen. The status of the sensor is illustrated in the sensor tile and will change colour depending on the status of the sensor:
- Green means that health is good
- Amber means that action is required soon
- Red means that action is required now
So, how do I change a NIOX® Sensor?
Step one: Open the compartment lid
- Ensure that the device is turned off by holding down the power button until the screen and green light turn off, and that the device is unplugged before continuing.
- Carefully place the device with the display facing down on a flat and clean surface with the handle holder off the edge of the table.
- A flat head screwdriver is required for opening the compartment lid on the back of the device. Unscrew and remove the compartment lid.
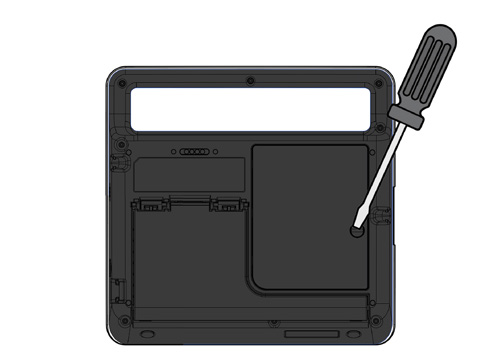
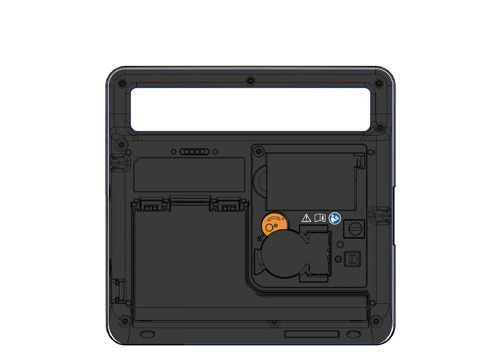
Completed this step?
Step two: Inserting the NIOX® Sensor
- Open the sensor can. Take care when completing this step as the inside of the opening may have sharp edges.
- Open the sensor package and reach into the pouch containing the sensor. Carefully remove the sensor without touching the white circle membrane.
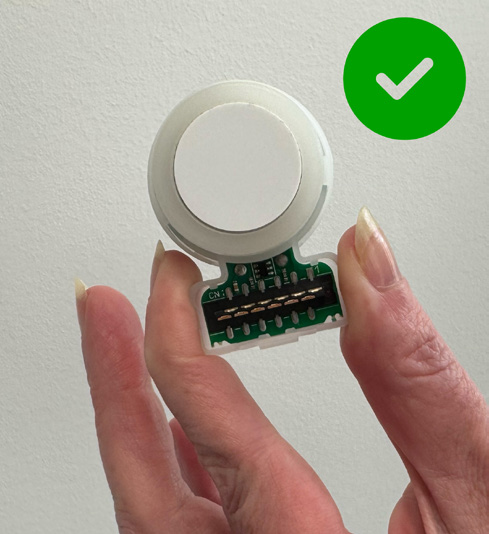
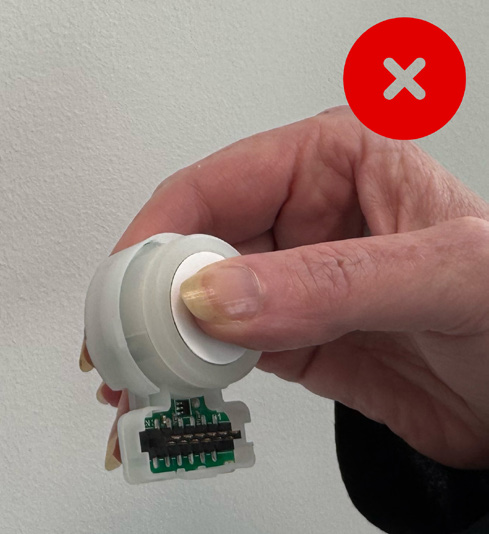
Note: Used or expired sensors should be recycled according to local facilities for electronic equipment.
- Turn the orange swivel counterclockwise and insert the new sensor. The sensor should fit into the device easily. Do not use excessive force when inserting it.
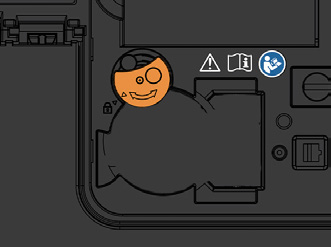
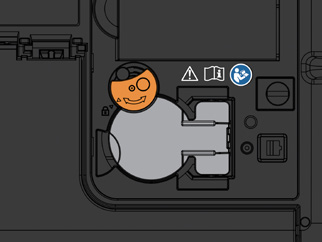
Note: The sensor should only be stored in its original unopened package or installed in a NIOX PRO® device.
- Turn the orange swivel clockwise until locked.
Completed this step?
Step three: Close the compartment lid
Replace the lid and tighten the screw by using a screwdriver
CAUTION: Make sure there are no foreign material or particles in the sensor compartment before closing it.
Place the device into standing position again and turn the device back on by holding down the power button until the screen turns on.
Completed this step?
Contact NIOX® Customer Services
Submit your details so that we can help you.
Support Checklist:
You've completed all the steps!

Track your progress.
Request a quote
Need a new NIOX® Sensor? Request a quote today.


* NIOX®. Data on File; MKT-DOF-007. 2024.
NIOX® Customer Support and Training
At NIOX® we are passionate about providing excellent support and training.


